http://www.permadi.com/blog/2010/03/android-sdk-using-custom-view-in-xml-based-layout/
Creating The Custom View Class
To begin with, let’s create a custom view class. For demonstration purpose, the one I am using is below:
01 |
package com.permadi.example; |
03 |
import android.content.Context; |
04 |
import android.util.AttributeSet; |
05 |
import android.view.LayoutInflater; |
06 |
import android.view.View; |
07 |
import android.widget.LinearLayout; |
09 |
public class CustomView extends LinearLayout |
11 |
public CustomView(Context context, AttributeSet attrs) |
13 |
super(context, attrs); |
15 |
LayoutInflater layoutInflater = (LayoutInflater)context.getSystemService(Context.LAYOUT_INFLATER_SERVICE); |
16 |
View view=layoutInflater.inflate(R.layout.example,this); |
This class loads the XML file named example.xml in the line:
1 |
View view=layoutInflater.inflate(R.layout.example,this); |
It is not necessary for the custom view class to be associated with an XML like above (this topic is explained here:http://permadi.com/blog/2010/03/android-sdk-loading-layout-and-associating-to-a-class/), you can use other techniques, such as constructing the view manually in the code.
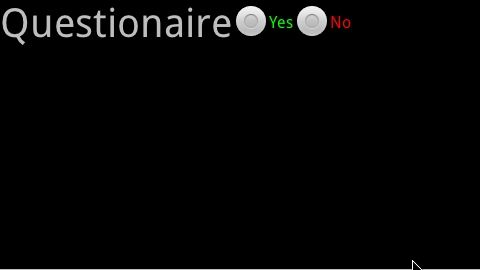
example.xml looks like this:
01 |
<TableLayout android:id="@+id/TableLayout01" |
02 |
android:layout_width="fill_parent" |
03 |
android:layout_height="fill_parent" |
04 |
xmlns:android="http://schemas.android.com/apk/res/android"> |
05 |
<TableRow android:id="@+id/TableRow01" |
06 |
android:layout_width="wrap_content" |
07 |
android:layout_height="wrap_content"> |
08 |
<TextView android:id="@+id/TextView01" |
09 |
android:layout_width="wrap_content" |
10 |
android:layout_height="wrap_content" |
11 |
android:textSize="40px" |
12 |
android:text="Questionaire"> |
14 |
<RadioButton android:id="@+id/RadioButton01" |
15 |
android:layout_width="wrap_content" |
16 |
android:layout_height="wrap_content" |
17 |
android:text="Yes" android:textColor="#0f0" |
18 |
android:layout_gravity="right" |
19 |
android:layout_alignParentRight="false"> |
21 |
<RadioButton android:id="@+id/RadioButton02" |
22 |
android:layout_width="wrap_content" |
23 |
android:layout_height="wrap_content" |
24 |
android:text="No" android:textColor="#f00" |
25 |
android:layout_gravity="right" android:layout_alignParentLeft="false" |
26 |
android:layout_alignParentRight="true"></RadioButton> |
And the layout generated by above xml is shown below:

Adding The Custom View Class To A Layout XML
To use the custom class in another xml based layout, you can refer to it by the fully qualified class name (fully qualified means:com.example.permadi.CustomView or whatever the package name plus the class name is for your custom class, and not just the class name). For example, let’s use com.example.permadi.CustomView on main.xml. (Note: In Eclipse, with the current version of SDK, you cannot drag and drop the custom view object into the editor, instead you need to enter the fully qualified class name manually into the xml file.)
1 |
<?xml version="1.0" encoding="utf-8"?> |
3 |
xmlns:android="http://schemas.android.com/apk/res/android" |
4 |
android:id="@+id/container" |
5 |
android:layout_height="fill_parent" android:orientation="vertical" android:layout_width="fill_parent"> |
6 |
<com.example.permadi.CustomView android:layout_height="wrap_content" android:layout_width="fill_parent"/> |
7 |
<com.example.permadi.CustomView android:layout_height="wrap_content" android:layout_width="fill_parent"/> |
8 |
<com.example.permadi.CustomView android:layout_height="wrap_content" android:layout_width="fill_parent"/> |
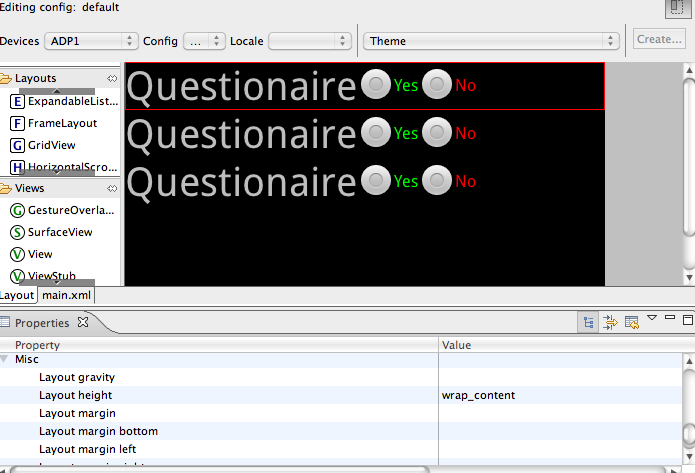
You can see that I created 3 instances of the CustomView in the main.xml – of course you can add more as needed.
Important: You must specify the layout_width and layout_height if you are not using the TableLayout, otherwise an exception will be thrown and the application will crash. Once you set the layout_width and layout_height, you can even use Eclipse editor to edit and see a preview:

In a real application, you might want to assign an unique id for each so that you can easily retrieve the instance(s), but in this example, I will simply load the main.xml and use it with setContentView in an Activity class.
01 |
package com.example.permadi; |
03 |
import android.app.Activity; |
04 |
import android.os.Bundle; |
06 |
public class MyActivity extends Activity { |
09 |
public void onCreate(Bundle savedInstanceState) { |
10 |
super.onCreate(savedInstanceState); |
11 |
setContentView(R.layout.main); |
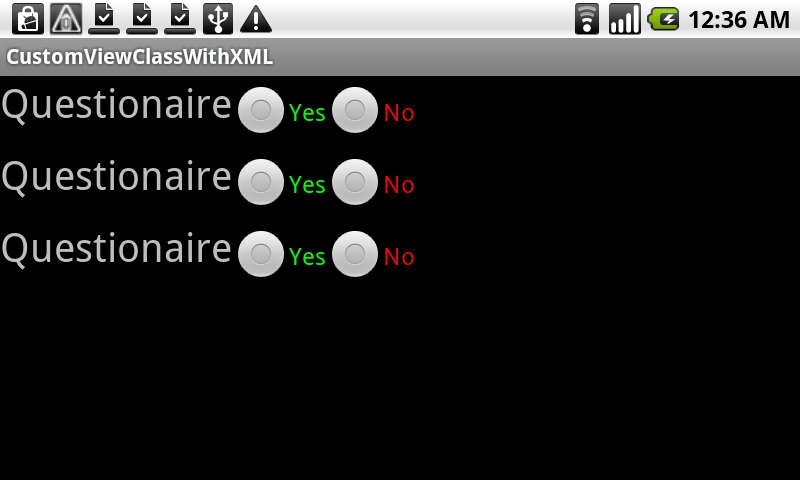
Here’s how the example looks in Nexus One:

I hope this tips is useful to help speeding up development time. The example project, created with Eclipse can be found here:
http://permadi.com/blog/2010/03/android-sdk-using-custom-view-in-xml-based-layout-download-example-project/ 


